Creating a Shape
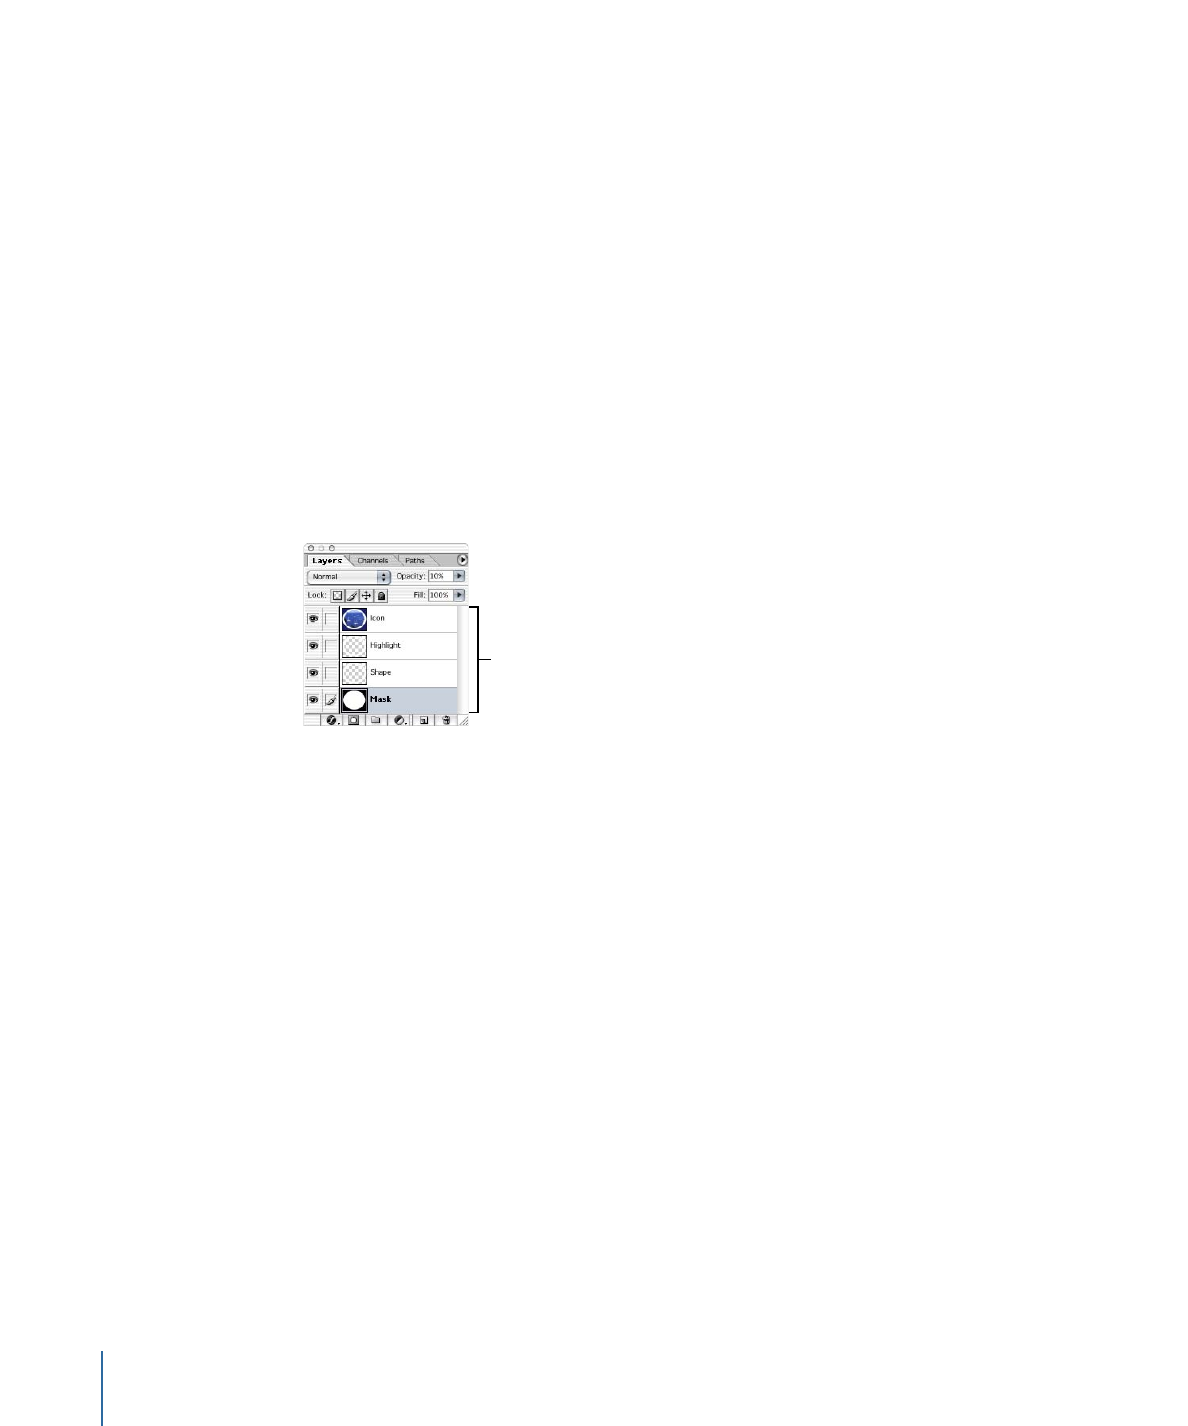
A shape is a Photoshop PSD file with up to four layers. DVD Studio Pro uses the layer
order to determine which layer serves each function.
Layers in a Photoshop
PSD file
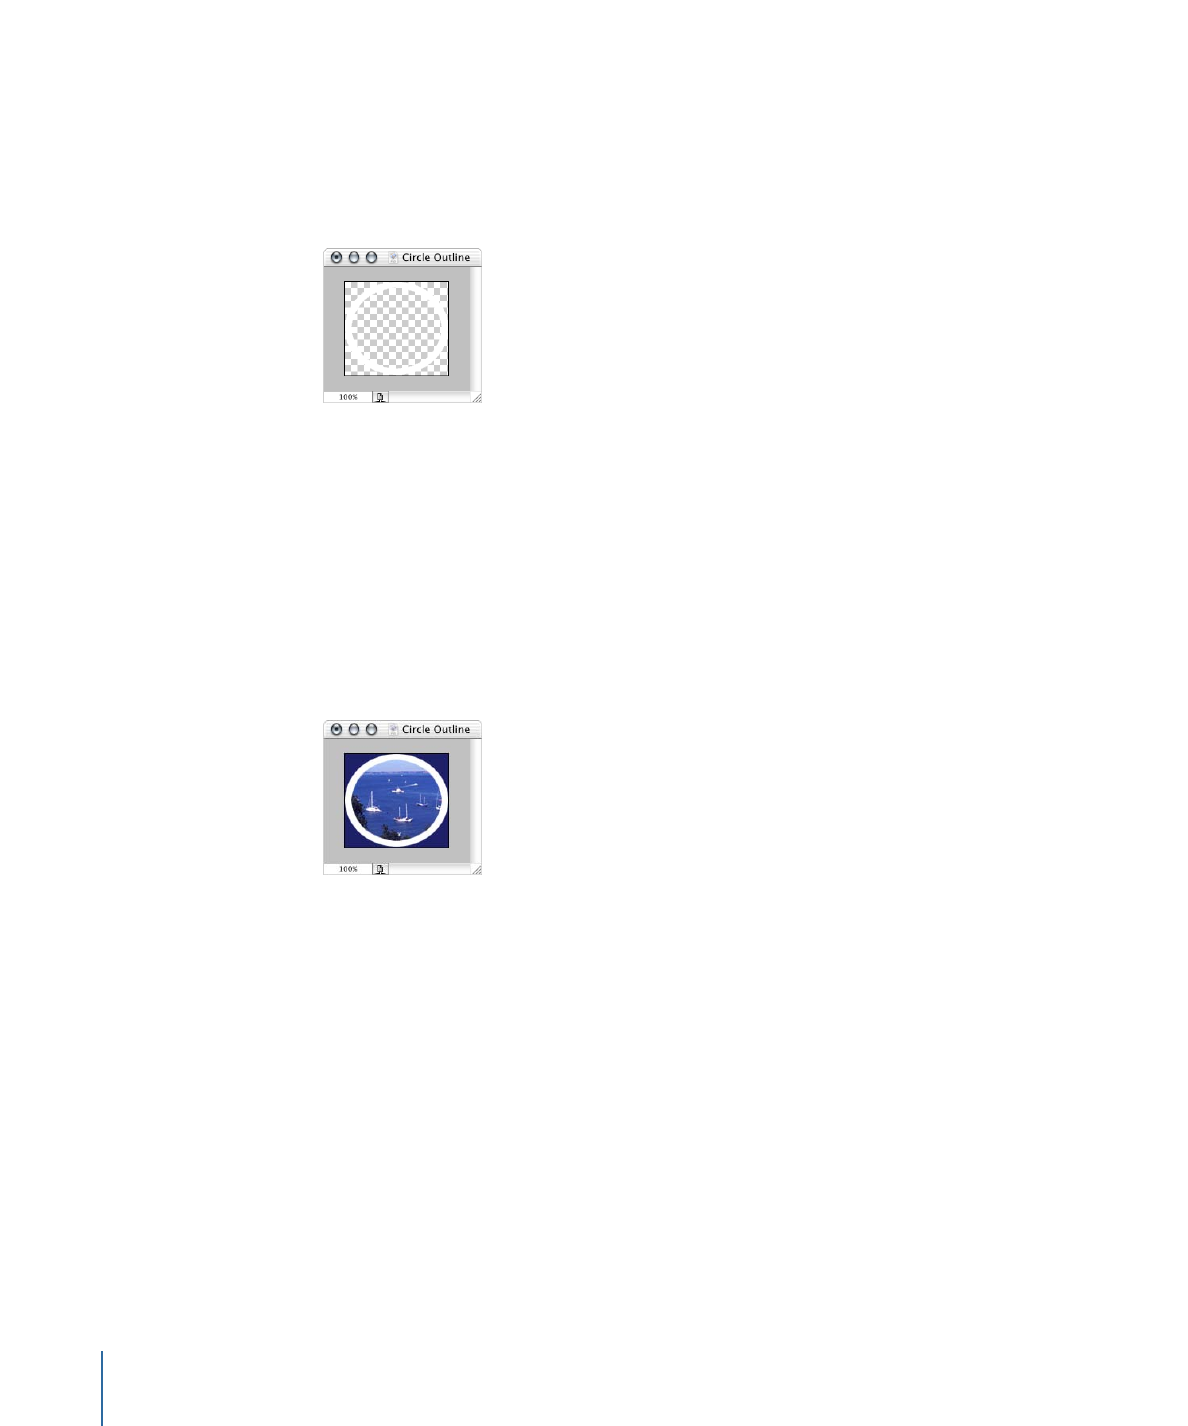
• First (bottom) layer: Contains the mask for the thumbnail image used when you assign
an asset to a button or drop zone. This layer should have a grayscale image to control
the thumbnail’s appearance. White areas are completely opaque (you see all of the
thumbnail image), gray levels are partially transparent, and black levels are completely
transparent (you see none of the thumbnail image). The mask can use an irregular
shape—the asset is scaled to fill it completely. Any part of the asset that falls outside
the mask then gets removed. If you don’t want a thumbnail image, you must still have
this layer present, but you can draw a black square or any simple image.
When you activate drop shadows on a button or drop zone using a shape,
DVD Studio Pro uses this layer, along with the second layer, to define the shape of the
drop shadow.
108
Chapter 6
Preparing Menu Assets

Note: If you make the image mask layer (the first layer) of a shape the same size as the
shape’s graphics layer (the second layer), you may see some of the mask layer around
the edges of the graphics layer. This is because the shape’s graphics layer is processed
differently than the mask layer. You can work around this issue by making the mask
layer slightly smaller than the graphics layer.
• Second layer: Contains the shape’s visible graphic. When used as a button, this is the
layer that determines how the button looks in its normal state. DVD Studio Pro uses
the RGB values for the shape. See
Setting a Shape’s Opacity
if you want this layer to
be partially transparent. Be sure to flatten any effects you apply to the layer. (See
Flattening a Photoshop Layer
for details.) Because this layer has a higher priority than
the first layer, it must provide a “window” to the thumbnail mask (if used).
When you activate drop shadows on a button or drop zone using a shape,
DVD Studio Pro uses this layer, along with the first layer, to define the shape of the
drop shadow.
• Third layer: Contains the highlight mask. This layer defines where the highlight colors
appear when you use the shape as a button and the button is selected or activated.
The actual image color does not matter, because it is this layer’s opacity that defines
the highlight, with 100% opacity selecting the black highlight color and 0% selecting
the white highlight color.
This layer is ignored if you use the shape in a drop zone.
109
Chapter 6
Preparing Menu Assets
Important:
If you use this layer’s opacity to create pseudo-soft or anti-aliased edges or
to have multiple highlight colors appear at once, you can only use the shape in menus
set to use the advanced grayscale overlay method. In these cases, the opacity values
map to the overlay colors as follows: 100% maps to black, 99% to 67% maps to dark
gray, 66% to 17% maps to light gray, and 16% to 0% maps to white.
• Fourth layer: Contains the shape’s icon, which appears in the Shapes tab in the Palette
and shape selector in the Button and Drop Zone Inspectors. This is an optional
layer—the second layer provides this function if this layer is not present. The
disadvantage of using the second layer is that often the shape alone does not provide
a good indication of what the button will look like once you assign an asset to it.
DVD Studio Pro uses the RGB values for the icon.
Note: Do not include the fourth layer in the file unless you are adding a graphic to be
used as the thumbnail. Adding an empty fourth layer results in a shape that you cannot
use in DVD Studio Pro.