Creating and Configuring the Stories
Once you have the track configured with chapter markers to identify each section, you
are ready to create the stories. For this project, you need a story for each section of the
movie that you want the viewer to be able to play individually. Once you create the story,
you need to choose the chapter marker that defines the section of the track that that
story should play.
To create and configure the stories
1
Click the Add Story tool in the Toolbar.
This adds a new story, related to the currently selected track, to your project.
2
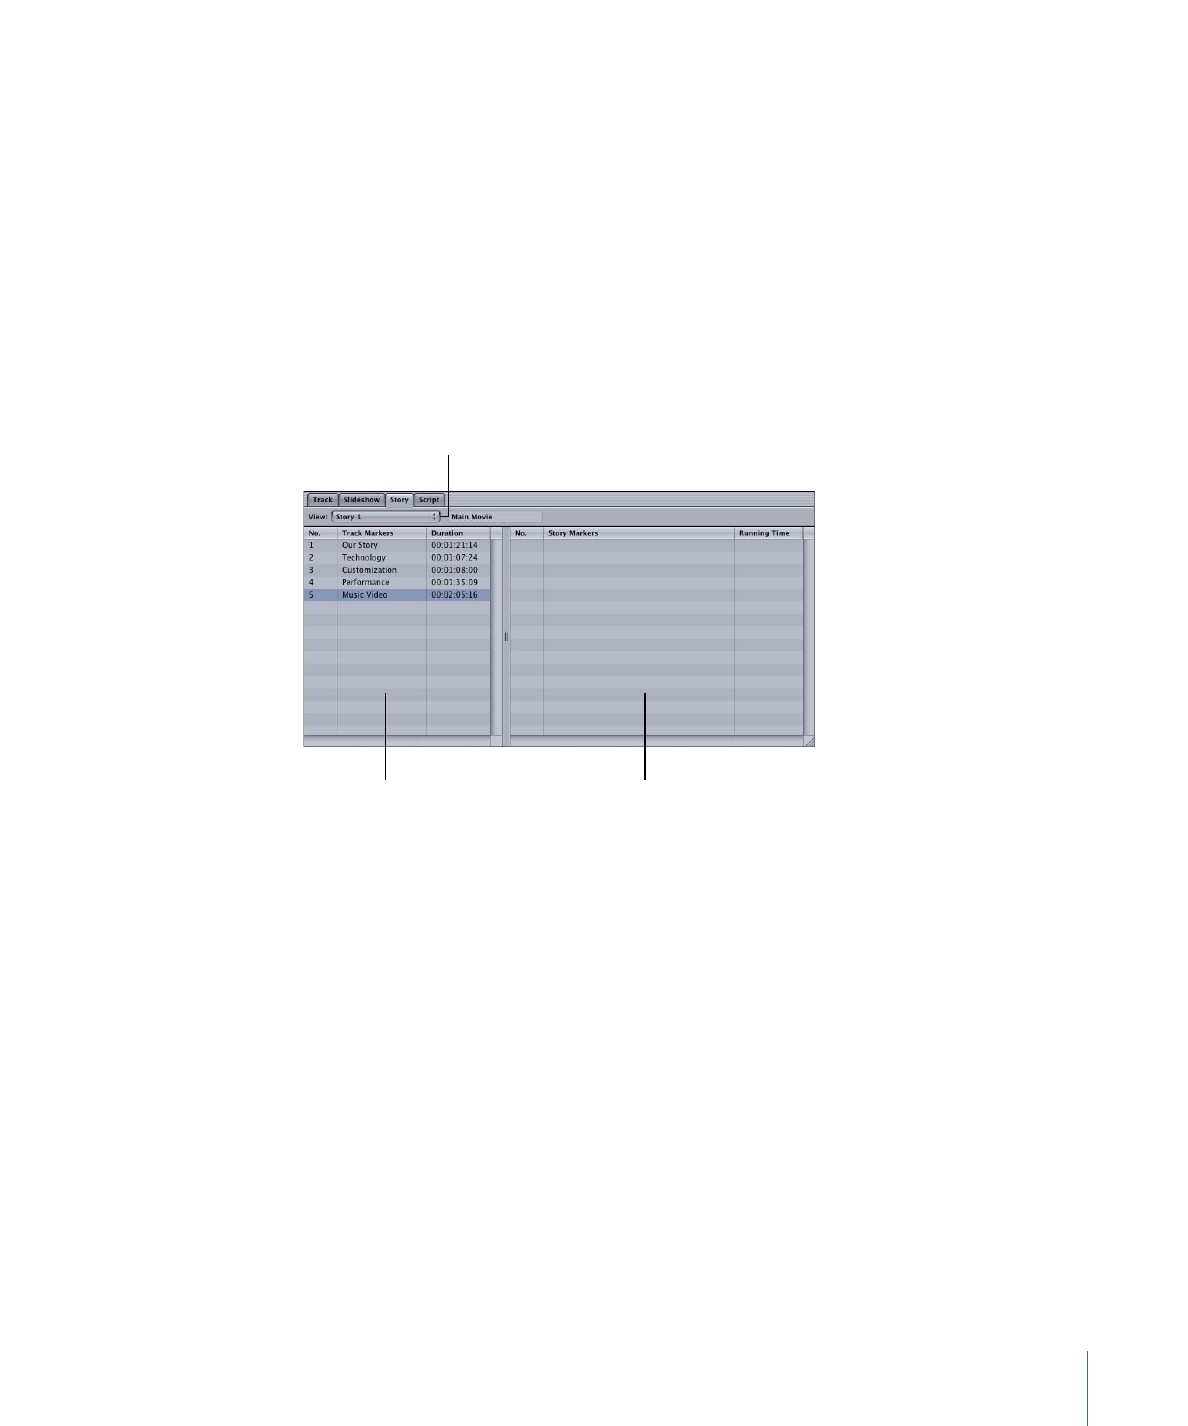
Double-click the new story’s icon in the Graphical tab to open it in the Story Editor.
The entry list. Drag
markers to this list
to create your story.
The source list. Drag
markers from this side
to the other side
to create your story.
Choose a story from
the current track to edit.
The left side of the Story Editor lists the chapter markers in the track. The right side lists
the markers that have been assigned to this story (which is empty at the moment).
3
Locate the chapter marker on the left side that you want this story to play and drag it to
the right side.
Note: If there are additional chapter markers in the section of the movie you want this
story to play, you need to drag them to the right side as well, in the order that they are
placed in the track.
4
Repeat the above steps for each section of the movie.
As mentioned previously, naming the chapter markers makes this process much easier.
Naming the stories, especially if there are a lot of them, can also help the process.
49
Chapter 3
How Do You Do That?