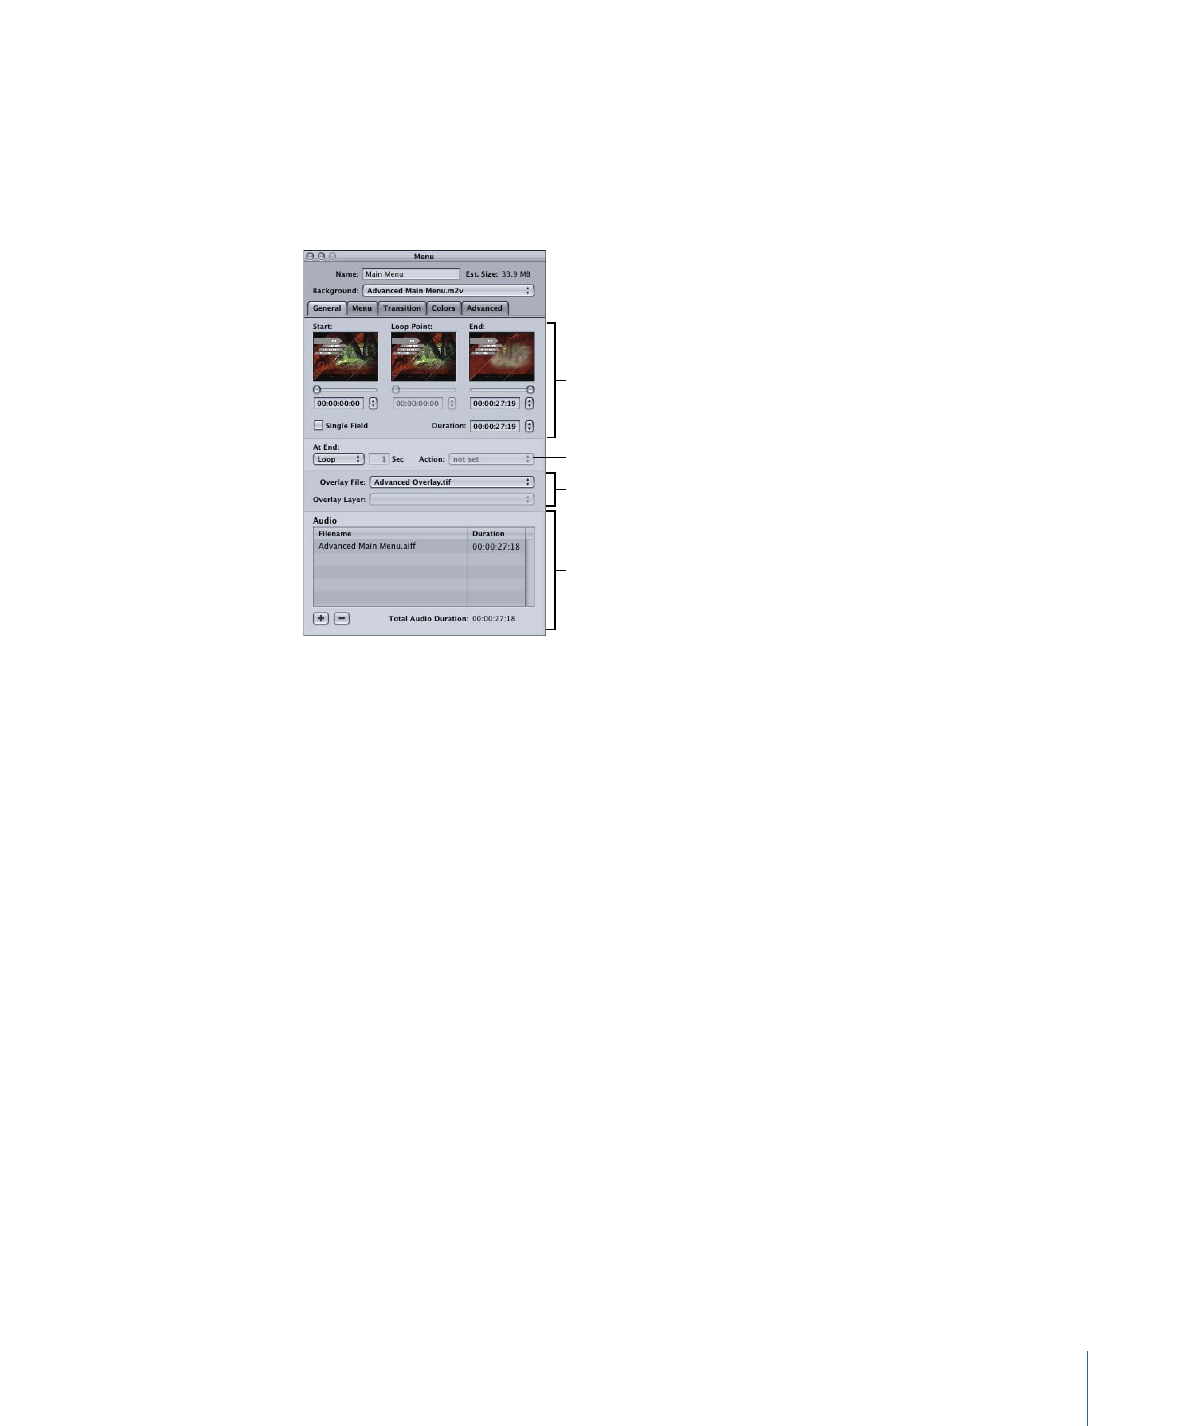
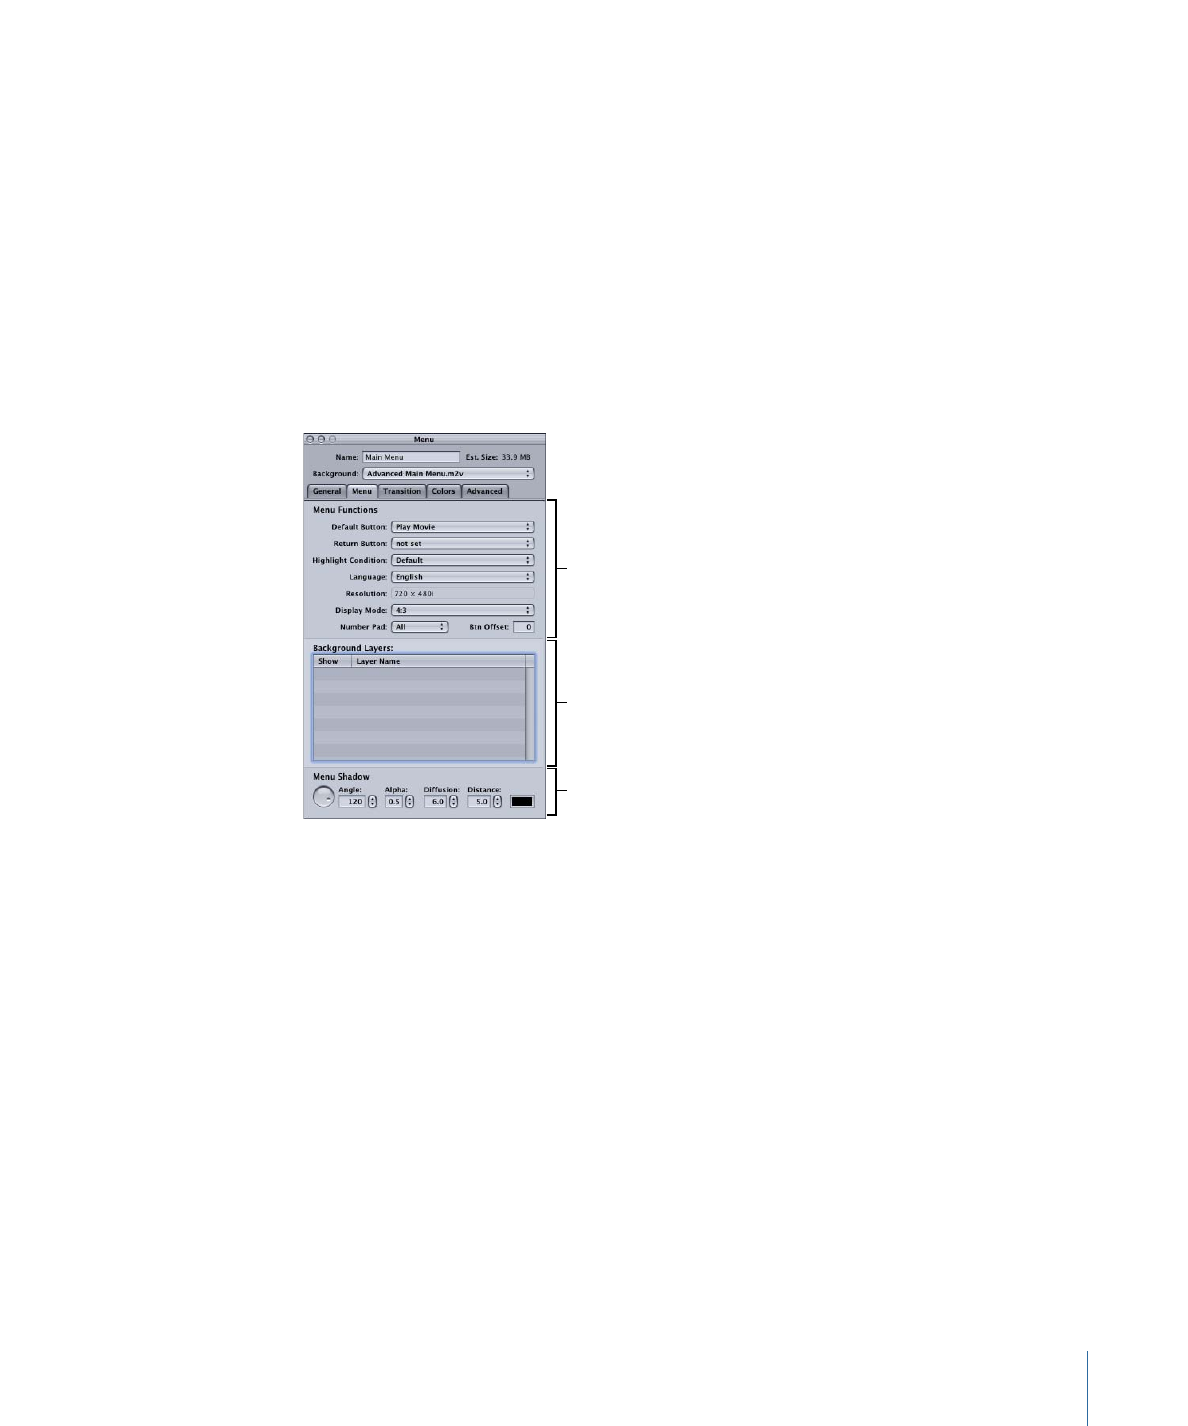
General Tab in the Menu Inspector for Standard Menus
The General tab in the Menu Inspector is divided into four sections: The upper section
contains basic menu settings, the next section contains settings for motion menus and
menu timeout actions, the next section contains the overlay selection settings, and the
bottom section contains the audio file settings.
Motion menu settings
Audio settings
Menu timeout
and jump actions
Overlay selections
Motion Menu Settings
The motion menu settings apply whenever you assign a video asset as the menu’s
background or add audio to the menu. See
Configuring Motion Menu Settings
for more
details on these settings.
• Start: Defines the starting frame for the motion background. Use either the slider or
timecode field to set this value.
• Loop Point: Defines the frame that is jumped back to when the motion background is
looped. By default this frame is set to be the same as the Start timecode. This is also
the point where button highlights appear and the viewer can begin navigating the
buttons. (Because button highlights are still images, you may want to delay their
appearance until the buttons stop moving if you are flying them onto the screen.) Use
either the slider or timecode field to set this value. This value can also be set by a
chapter marker in the background video.
• End: Defines the last frame for the motion background. The At End setting becomes
active once this frame is reached. Use either the slider or timecode field to set this
value.
• Duration: Adjusts automatically to match the time between the Start and End settings.
Adjusting Duration only affects the End setting.
257
Chapter 13
Creating Menus Using the Standard Method

• Single Field: Optimizes playback when using field-based video sources. This is especially
important with video that has fast motion, and will reduce any motion artifacts. Selecting
Single Field with frame-based video sources results in reduced resolution (edges may
appear jagged).
• At End: Sets the motion menu action when the End time is reached during playback.
Choose one of these settings:
• Still: Freezes the video’s last frame once the video asset finishes playing. If there is
an audio file assigned, it will also play once and then stop.
• Loop: Activates the Start, Loop, and End controls if there is a video asset assigned as
the background. See
Configuring Motion Menu Settings
for information on using
these controls.
• Timeout: Activates the Sec and Action settings. This allows you to configure the menu
so that if the viewer does not select a button for a specified amount of time, the title
automatically jumps to the element specified with the Action setting.
Menu Timeout and Jump Action
You can set whether a menu appears indefinitely or has a timeout duration. If you set a
timeout duration, the title jumps to the element chosen in the Action pop-up menu after
the specified amount of time. If the menu has a video asset assigned as the background,
the timeout’s countdown does not start until the video finishes playing. You’d generally
use a timeout setting with titles played at a sales kiosk, where you want to have something
playing onscreen as much as possible.
• Sec: Enter the amount of time, in seconds, that the menu appears if no button is
selected.
• Action: Choose the element to jump to once the timeout value is reached. If the menu
has a default transition, the transition plays before the element is jumped to.
Overlay Selections
You use these settings only if you are using an overlay with this menu.
• Overlay File: Choose the file with the menu’s overlay. See
Choosing the Menu’s Overlay
for more information.
• Overlay Layer: Becomes active whenever you assign a PSD file with layers as the menu’s
subpicture overlay. You choose the overlay layer from the pop-up menu.
Audio Settings
See
Adding Audio to a Menu
for more information on using the settings in this area.
• Filename area: Lists the audio files assigned to the menu. You can add audio files to
the menu by dragging them here. You can rearrange their order by dragging the
filenames to a new position.
258
Chapter 13
Creating Menus Using the Standard Method
• Add (+): Opens the file selection dialog, allowing you to add one or more audio files
to the menu.
• Delete (–): Removes the selected audio file from the menu.
• Total Audio Duration: Shows the combined duration of all audio files assigned to the
menu.