Creating a Template or Style
While creating a template or style is not difficult, it is worth spending some planning time
so that you can make the templates and styles as useful as possible.
To create a template or style
1
Configure a standard menu to match what you want the template or style to be. If you’re
creating a template or a layout style, use care to name the buttons and create them in
the correct order. See
About Button Numbers
and
Applying Templates or Layout Styles
to a Menu with Buttons
for details.
2
If you’re creating a button, text, or drop zone style, select the specific item on the menu
whose settings you want to include in the style. For templates and layout styles, you do
not need to select anything on the menu.
324
Chapter 14
Using Templates, Styles, and Shapes to Create Your Menus

3
Do one of the following:
• Choose Project > Create in Menu > Template or Project > Create in Menu > Style.
• Click Create in the Palette.
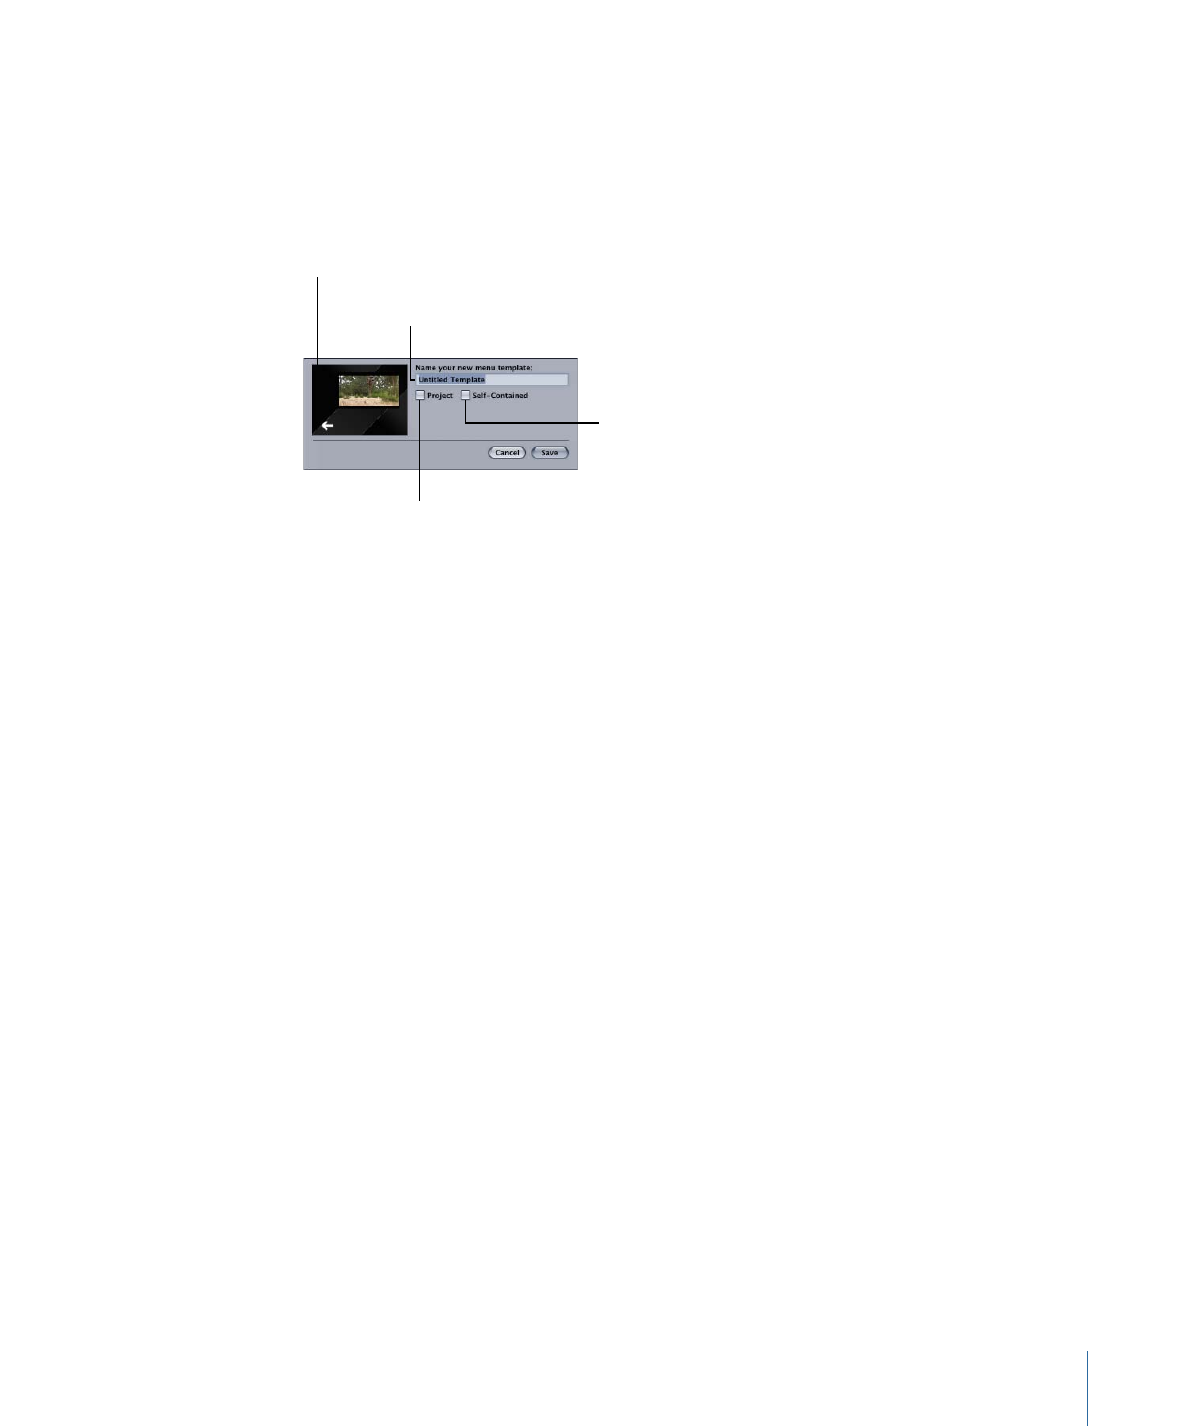
The Create Template or Create Style dialog opens.
Select Self-Contained
to copy the assets in this
template or style to its file.
Leave unselected to have the
template or style reference
the assets.
The thumbnail of the
template or style
Select Project to have this
template or style available
to only this project.
Enter the name of the
template or style.
4
Enter a name for the template or style.
5
Select the Project checkbox if you want the template or style to be available only to this
project. Leaving this unselected makes this template or style available to all projects on
this system.
6
Select the Self-Contained checkbox to copy the assets used by this template or style into
its file. This makes it easier to copy the file to another system where it can be imported
by another project.
7
Click Save.
The template or style is now saved and appears in the Palette.