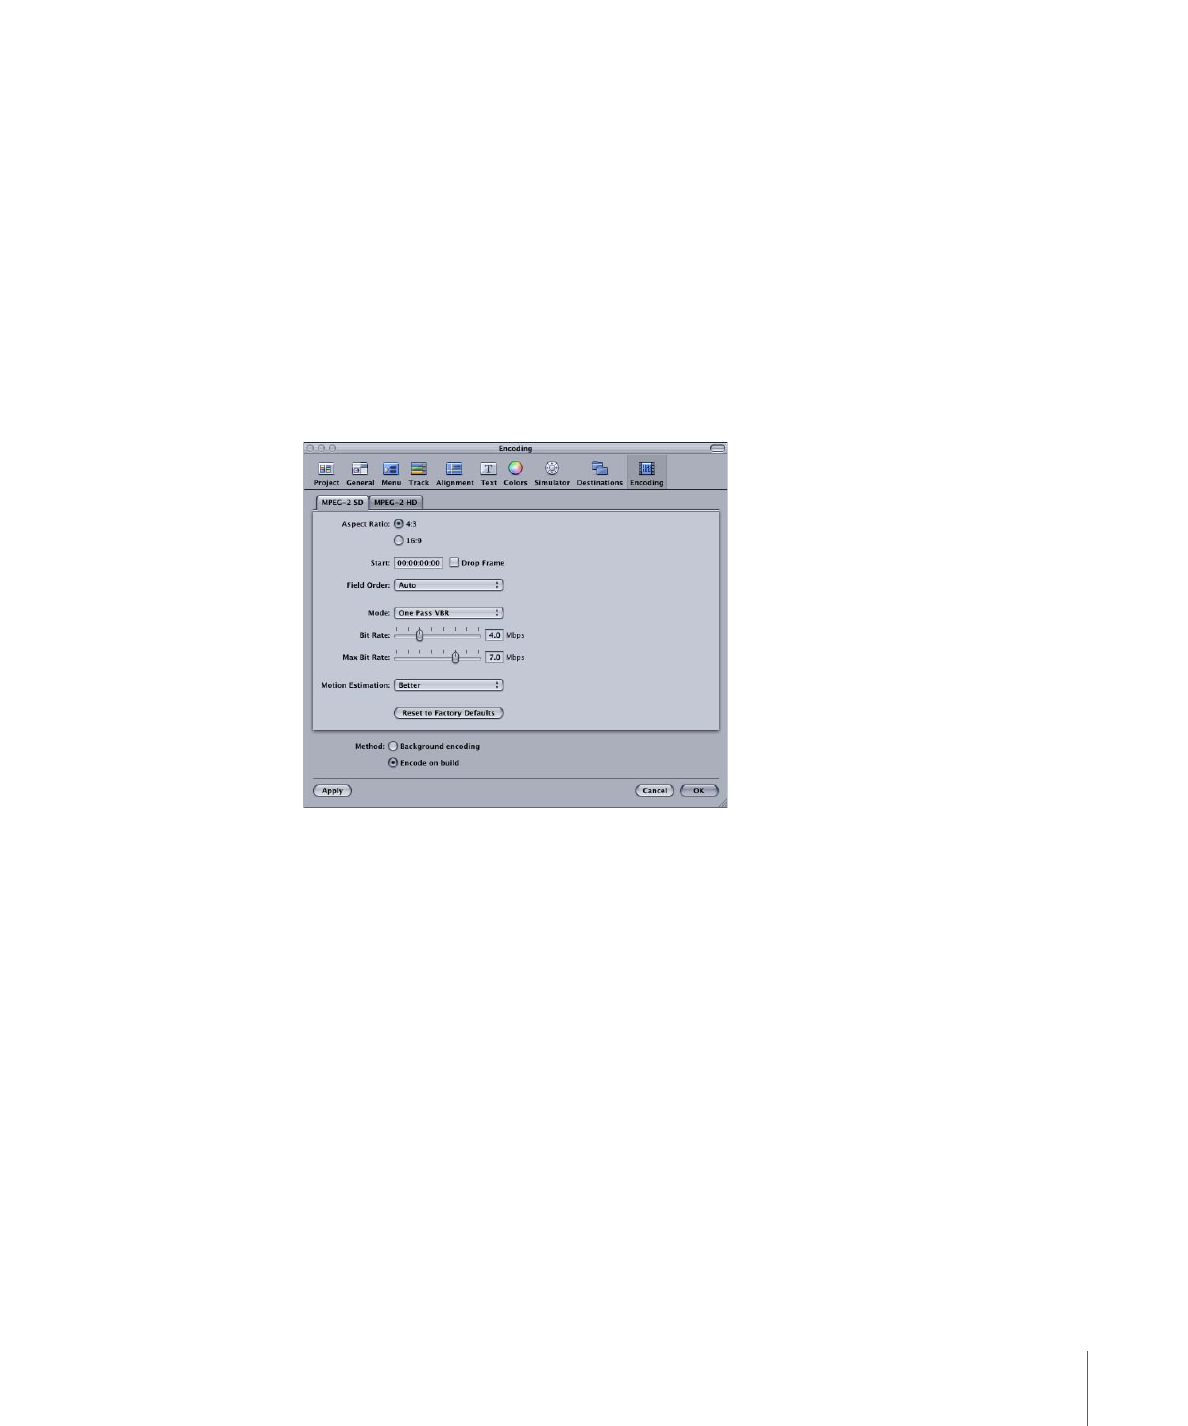
Encoding Preferences
The Encoding pane of DVD Studio Pro Preferences contains two tabs: MPEG-2 SD and
MPEG-2 HD. Each tab has the same settings, with the exception of the higher bit rate
settings allowed in the MPEG-2 HD tab.
The settings in the MPEG-2 SD tab are automatically applied to all QuickTime video assets
added to an SD project (including those with an HD video resolution) and assets with an
SD video resolution added to an HD project. The MPEG-2 HD tab’s settings are applied
to QuickTime video assets with an HD video resolution added to an HD project. (An
exception are H.264 and HDV QuickTime assets, which are already properly encoded.)
Settings in the MPEG-2 SD and MPEG-2 HD Tabs
• Aspect Ratio: Select the aspect ratio to use.
• 4:3: This aspect ratio is only available for SD video assets.
• 16:9: This aspect ratio is supported by both SD and HD video assets. Note that
selecting 16:9 does not convert the video to the 16:9 aspect ratio. The file to be
encoded must already be in a 16:9 anamorphic format. See
What Exactly Is a 16:9
Asset?
for more information.
69
Chapter 4
Preparing Video Assets

• Start: Sets the starting timecode of the encoded MPEG stream. This is most often set
to match the timecode of the original video, ensuring that any timecode-based lists
you have, such as a chapter list, marker positioning file, or subtitle file, match the
encoded video.
• Drop Frame: Select this checkbox to use drop frame timecode for assets using the NTSC
frame rate.
• Field Order: Choose the field order (Top or Bottom) that matches the video being
encoded. This is also known as the field dominance setting in other products. Each
interlaced NTSC and PAL video frame is comprised of two fields, each containing every
other video line. The top field is also known as field two, the upper field, or the odd field.
The bottom field is also known as field one, the lower field, or the even field.
If the field order is set incorrectly, any motion in the video will appear very jagged when
played back. Most professional and DV sources are field one dominant, and should use
the Bottom setting. If you are unsure of the field order of your source video, choose
Auto to let the encoder attempt to determine the field order.
Note: The Field Order setting does not apply to progressive scan video.
• Mode: You can choose from three encoding modes, each with its own advantages and
disadvantages.
See
MPEG Encoding Methods
for more information on the encoding methods.
• One Pass: With this option chosen, the encoder uses a one-pass encoding method
with a constant bit rate (CBR). Note that the integrated MPEG encoder One Pass
mode actually varies the bit rate a small amount.
• One Pass VBR: With this option chosen, the encoder uses the one-pass variable bit
rate (VBR) encoding method.
• Two Pass VBR: With this option chosen, the encoder uses the two-pass VBR encoding
method (one pass to create a motion profile of the video and a second pass to perform
the encode).
• Bit Rate: Set the bit rate for the One Pass encoding method and the basic bit rate for
the One Pass VBR and Two Pass VBR encoding methods. When using one of the VBR
encoding methods, you cannot set Bit Rate any higher than 85% of the Max Bit Rate
setting. See
Choosing a Bit Rate for SD Projects
for more information.
• Max Bit Rate: Set the maximum bit rate that can be used during a One Pass VBR or Two
Pass VBR encode. You cannot set the Max Bit Rate setting lower than the Bit Rate setting
or 5 Mbps (whichever is higher). Because the VBR methods are most effective when
the maximum bit rate is about double the basic bit rate, or at least 1 to 3 Mbps higher
than the basic bit rate, the Max Bit Rate setting is forced to be higher than the Bit Rate
setting.
Note: The Max Bit Rate setting does not affect the size of the encoded file—it only sets
the upper limit that can be used during the encode.
70
Chapter 4
Preparing Video Assets

• Motion Estimation: Choose a Motion Estimation setting that provides a balance between
quality and speed of encoding. This setting controls how much time is spent determining
the motion between video frames.
• Good: The fastest Motion Estimation setting. This mode does well even with significant
amounts of motion between frames, if the motion has minimal interfield motion
within frames. For example, footage that has been exposed to frame-rate conversion
or other effects processes tends to have little interfield motion. In general, use Good
with the One Pass encoding mode.
• Better: A good general purpose Motion Estimation setting. The Better mode provides
good results even with complex interlaced motion. Better works well for almost all
types of interlaced video sources, even shaky footage from hand-held consumer
camcorders. In general, use Better with One Pass VBR and Two Pass VBR.
• Best: This is the highest quality Motion Estimation setting and should be used for
the most demanding and complex motion for interlaced sources. It is slower than
the Better mode. In general, use the Best mode to maximize quality when using One
Pass VBR or Two Pass VBR.
• Reset to Factory Defaults: Click this to restore the current tab’s settings to the default
settings.
Settings Outside of the Tabs
• Method: Select when you want the asset to be encoded.
Note: An advantage of selecting “Background encoding” is that, once the assets are
encoded, the encoded versions of them appear in the Simulator and the Viewer when
playing a track. This makes it possible to see the video as it will appear on the DVD,
and not the QuickTime version. See
Is That the QuickTime or MPEG Encoded Version?
for more information.
• Background encoding: The encoding begins as soon as you import the asset. The
encoding takes place in the background, allowing you to continue working on your
project. A progress bar appears in the Status column of the Assets tab. Once the
encoding process finishes, the Status column displays Done. See
Default Columns
in the Assets Tab
for more information.
• Encode on build: The encoding does not start until you complete your project and
build the VIDEO_TS or HVDVD_TS files.