
Configuring GPRM Partitions
You are able to individually configure the partitions of each 16-bit GPRM register using
either the Script Inspector or the Advanced tab of the Disc Inspector. Once configured,
you are then able to name them and save the configuration, which can then be loaded
into a different project.
Important:
Once you partition a GPRM register and use it in a script, you cannot change
the GPRM’s partition settings. You also cannot import a script’s item description unless
the GPRMs it uses are partitioned the same as when the item description was saved.
To configure a GPRM’s partition
1
Do one of the following:
• Select a script in the Outline or Graphical tab. The Script Inspector appears.
• Select the disc in the Outline tab, then click the Advanced tab in the Disc Inspector.
• Click an empty area in the Graphical tab, then click the Advanced tab in the Disc
Inspector.
513
Chapter 20
Creating Scripts
2
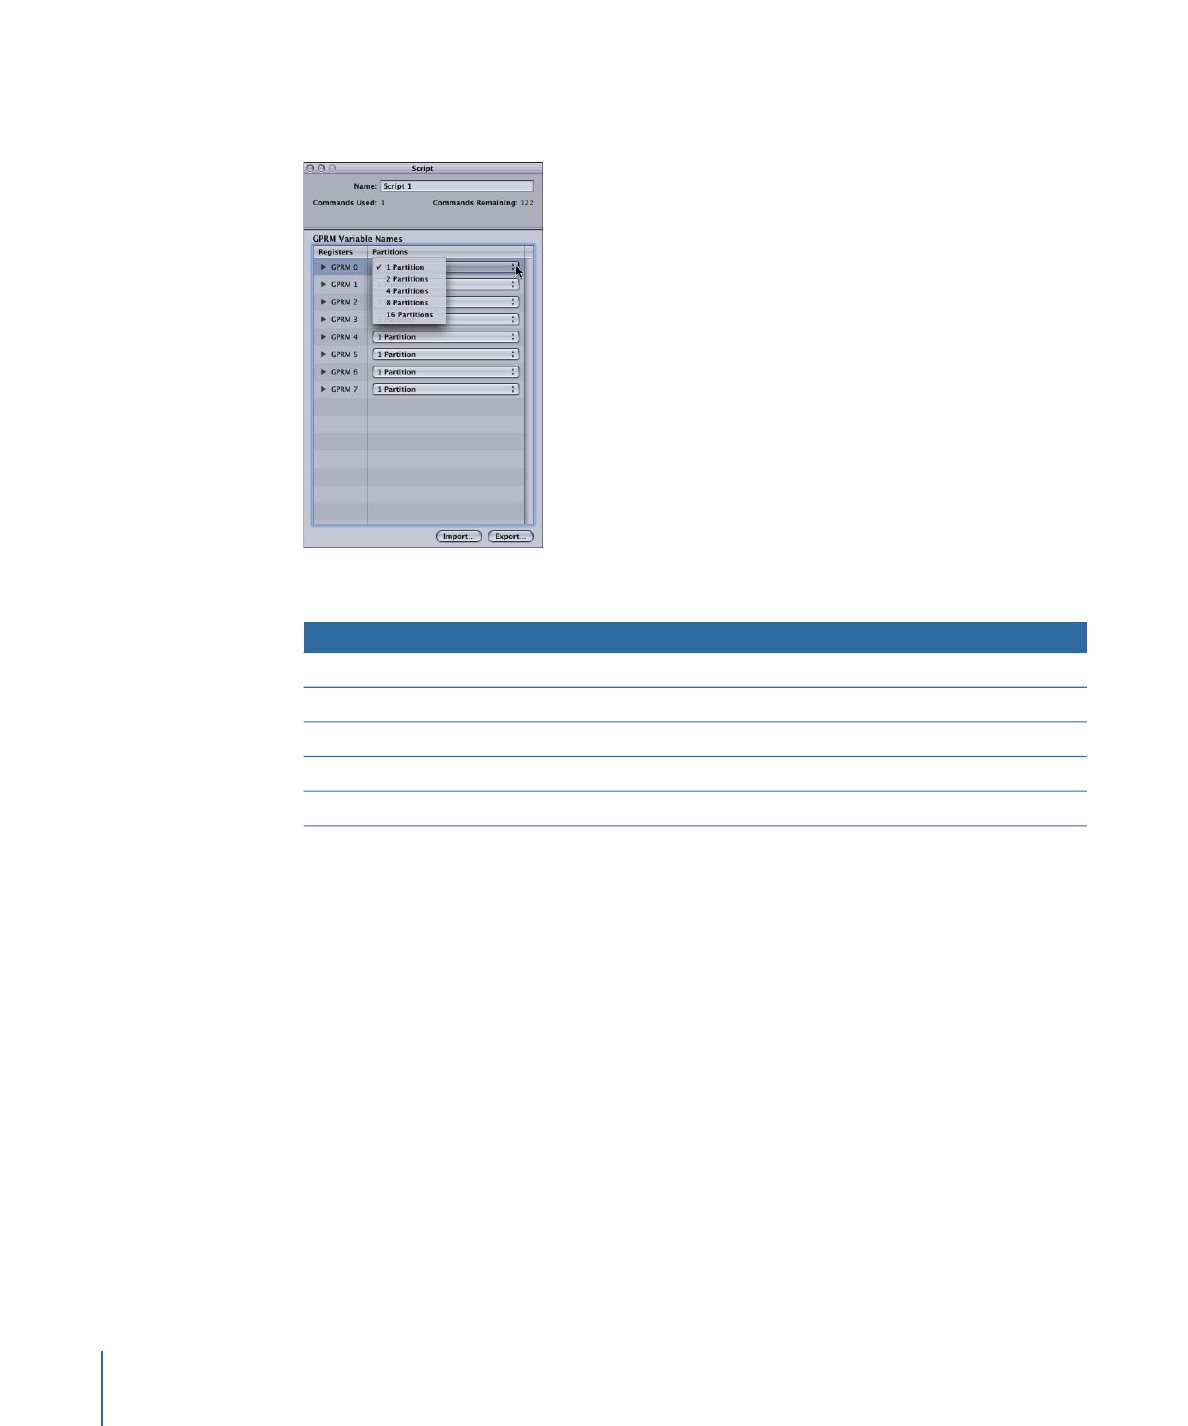
Click the pop-up menu for the GPRM you want to partition, then choose the partition
configuration to use from the pop-up menu.
You can choose from the following:
Range of each register
Result
Partition configuration
0-65535
One 16-bit register
1 Partition
0-255
Two 8-bit registers
2 Partitions
0-15
Four 4-bit registers
4 Partitions
0-3
Eight 2-bit registers
8 Partitions
0-1
Sixteen 1-bit registers
16 Partitions
Note: Any GPRMs that are currently used by a script have their pop-up menus deactivated
and cannot have their partition configuration changed.
514
Chapter 20
Creating Scripts
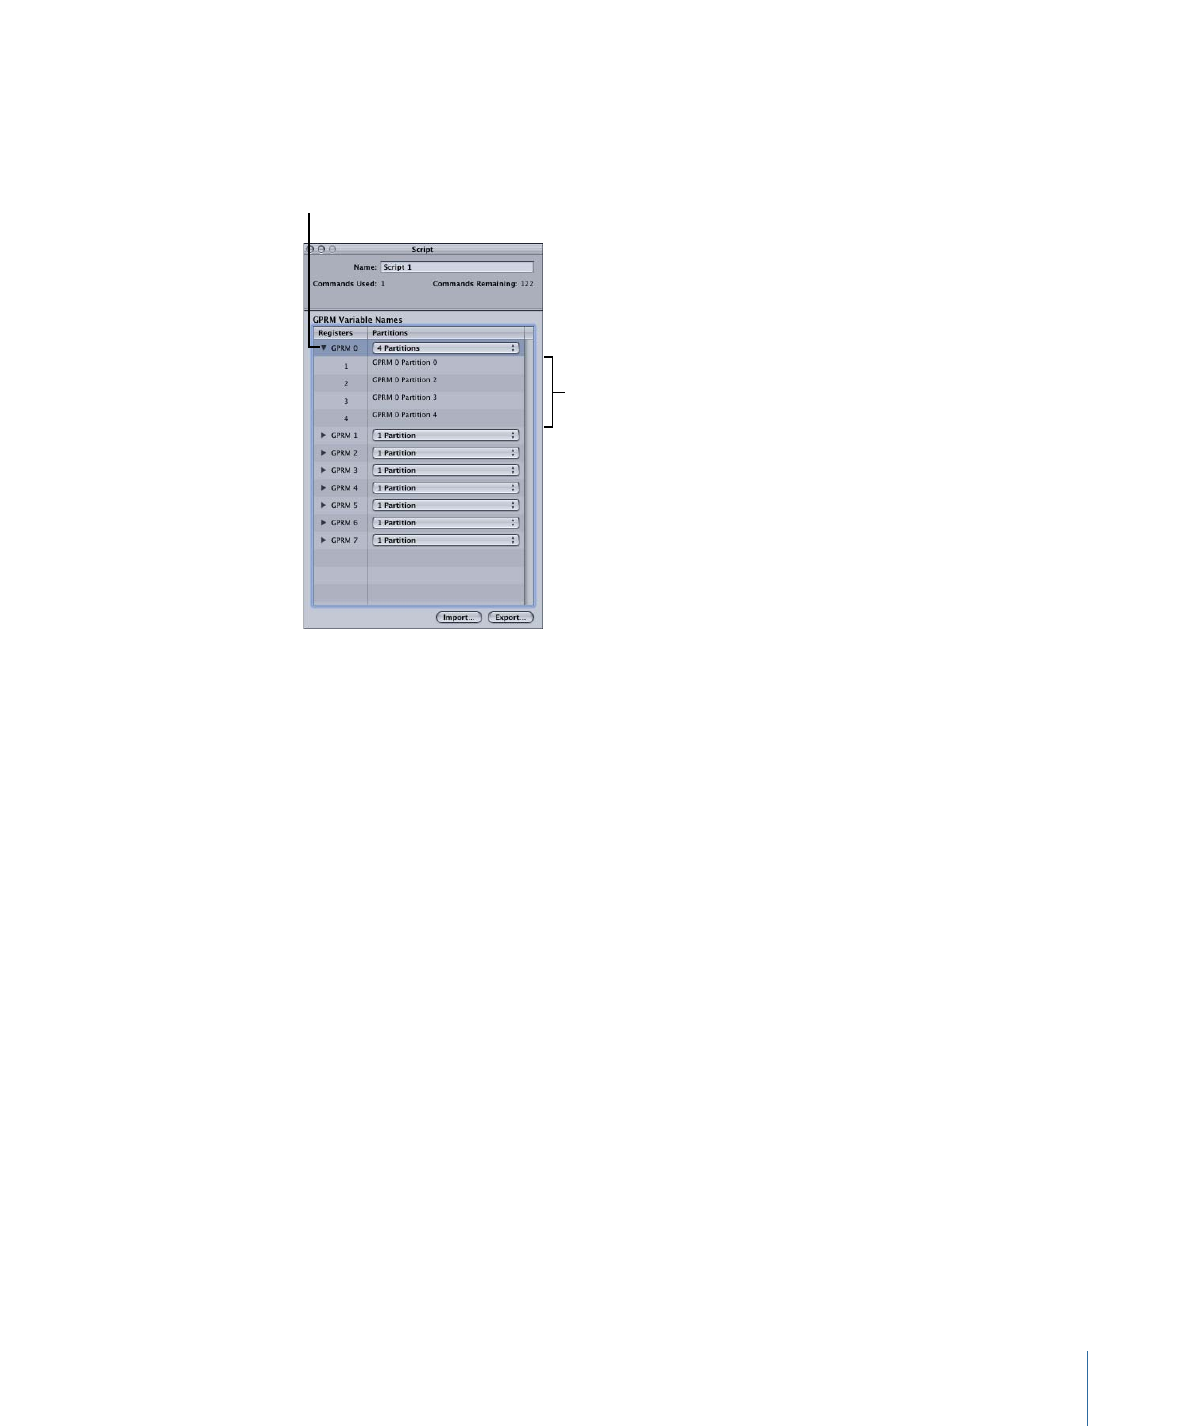
Once you choose the partition configuration to use for that GPRM, it displays the new
registers.
Click the disclosure
triangle to show or hide
the GPRM’s registers.
The registers of a
partitioned GPRM