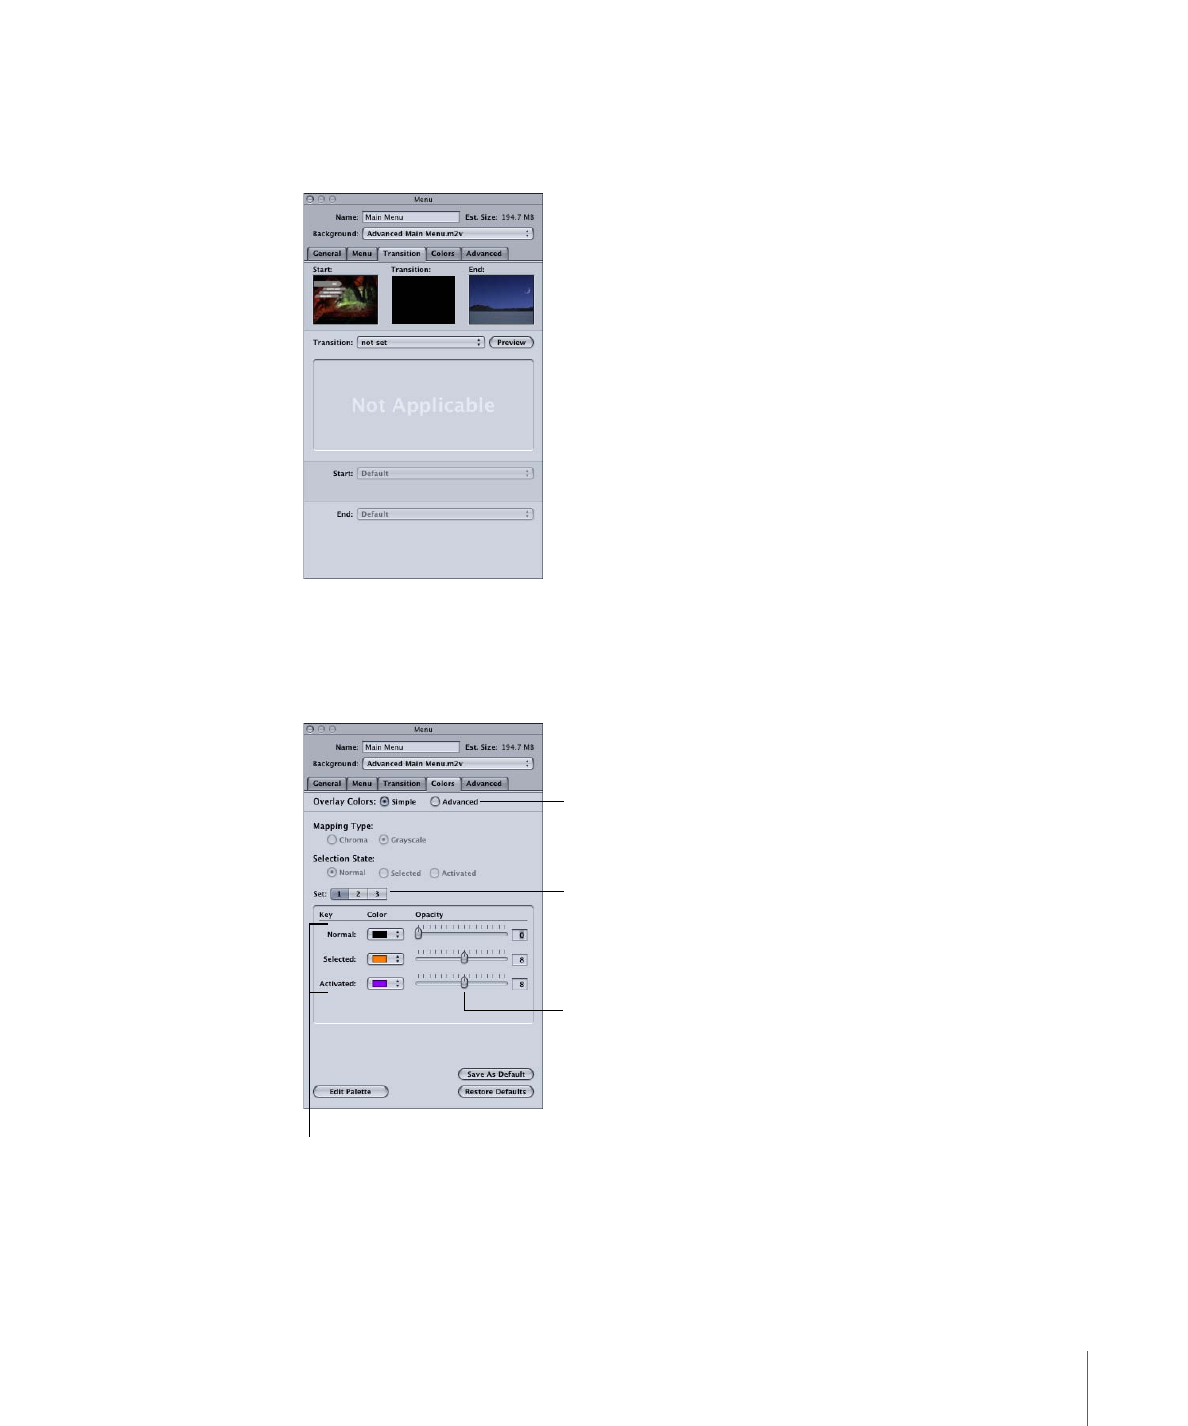
Colors Tab in the Menu Inspector with Simple Selected
The following settings are available in the Colors tab in the Menu Inspector when you
select the simple overlay color mode.
Select Simple or Advanced,
depending on the overlay
you are using.
Select the color mapping
set to configure.
Set the highlight’s
opacity.
Choose a color for each
button state.
• Overlay Colors: Select the overlay color method to use.
• Simple: Select Simple if you are using a simple overlay.
• Advanced: Select Advanced if you are using an advanced overlay.
261
Chapter 13
Creating Menus Using the Standard Method

• Set: Select the color mapping set (1, 2, or 3) to configure. You cannot assign sets to
buttons from the Menu Inspector; you must select a button or group of buttons and
select their set in the Button Inspector. All new buttons use set 1.
Note: These sets apply only to the selected and activated states of the buttons. The
normal state color mapping setting applies to the entire overlay graphic unless a
button’s active area is selected or activated. See
Color Mapping Sets
for more
information.
• Color: Choose the color for each of the three button states from the current Color
Palette.
Note: This also sets the highlight colors for the black overlay color if an advanced
overlay is also used on this menu.
• Opacity: Set the opacity for each of the highlight colors. You can use the slider or enter
a value from 0 (completely transparent) to 15 (completely opaque).
Note: This also sets the opacity for the black overlay color if an advanced overlay is
also used on the menu.
• Save As Default: Saves this color mapping configuration as the default to be used on
all new menus you create.
Simple and advanced overlays use the same default mapping configuration.
• Restore Defaults: Replaces the existing settings with those of the default color mapping
configuration.
• Edit Palette: Displays the Color Palette window, which you can use to change colors
within the palette.
262
Chapter 13
Creating Menus Using the Standard Method