Setting Drop Zone Properties
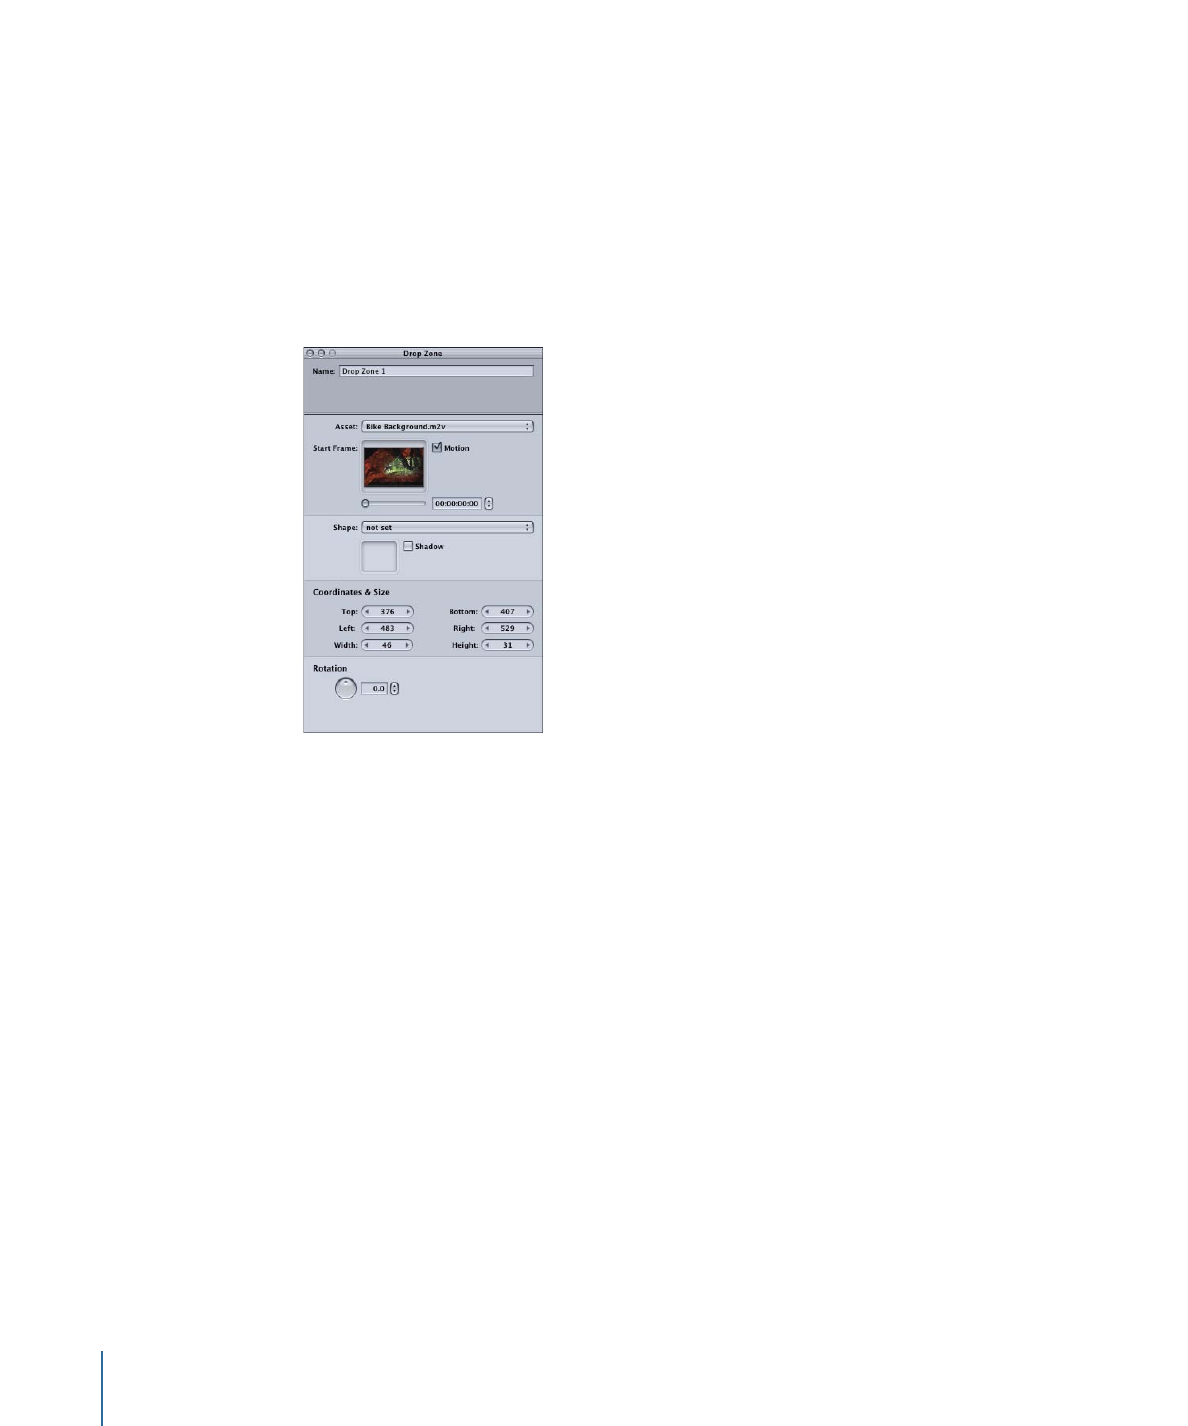
The Drop Zone Inspector appears once you create a drop zone. It contains basic settings
for configuring the drop zone.
• Name: Enter a name for the drop zone.
• Asset: Use this pop-up menu to assign an asset to the drop zone. You can choose any
applicable assets.
• Start Frame: When the asset assigned to the drop zone is a video clip, this area displays
the video. Use the slider or the timecode entry to choose the start point for motion
playback (if motion is enabled) or to choose the frame to use in the drop zone if motion
is not enabled.
• Motion: Select this checkbox to enable motion in the drop zone when the drop zone’s
asset is a video clip. See
Configuring Motion Menu Settings
for details on looping video
within drop zones.
• Shape: Use this pop-up menu to choose a shape to assign to the selected drop zone.
A thumbnail image of the selected shape appears next to the pop-up menu. The pop-up
menu lists the existing shapes by their names, grouped as Apple Shapes (supplied with
DVD Studio Pro), Custom Shapes (added shapes available to all projects), Project Shapes
(added shapes available to this project only), and Patch Shapes. Use the Palette’s Shapes
tab to manage the shapes and as another way to select a shape.
286
Chapter 13
Creating Menus Using the Standard Method

• Shadow: Select this checkbox to apply the menu’s drop shadow setting to this drop
zone.
• Coordinates & Size: This area lets you set the location of each edge of the drop zone,
plus the drop zone’s height and width. The upper-left corner of the menu is at pixel 0,
line 0. You can enter values for each edge, allowing you to precisely position and size
the drop zone. (You can also drag the drop zone and each of its edges with the pointer.)
• Rotation: Rotate the knob or enter a value to rotate the drop zone. The values can go
from 0.0 to 359.9, with a value of 0.0 as normal.